Linda Cain
Before we dive into the treasure that is homemade flour tortillas, consider what deliciousness you can pair with them. There’s an endless array of options! Imagine rolling these fresh tortillas up with succulent pulled pork topped with zesty salsa. Pack them with sautéed veggies and black beans for a satisfying vegetarian meal.
You might even enjoy them with scrambled eggs for breakfast—a delightful way to start your day. The possibilities are as vast as your culinary creativity!
The Allure of Authentic Homemade Flour Tortillas

You’ll Also Like These Recipes
Every cook knows there’s something magical about fresh tortillas. I remember the first time I made homemade tortillas with my grandmother. The aroma filled the kitchen, wrapping around us like a warm hug. It wasn’t just about filling our bellies; it was about connection, tradition, and flavor. In this blog post, I’m excited to guide you through the process of making Authentic Homemade Flour Tortillas. You’ll see how easy it is to create these delightful rounds of goodness right in your kitchen. Trust me, after one bite, you’ll want to make them again and again!
What is Authentic Homemade Flour Tortillas Recipe?
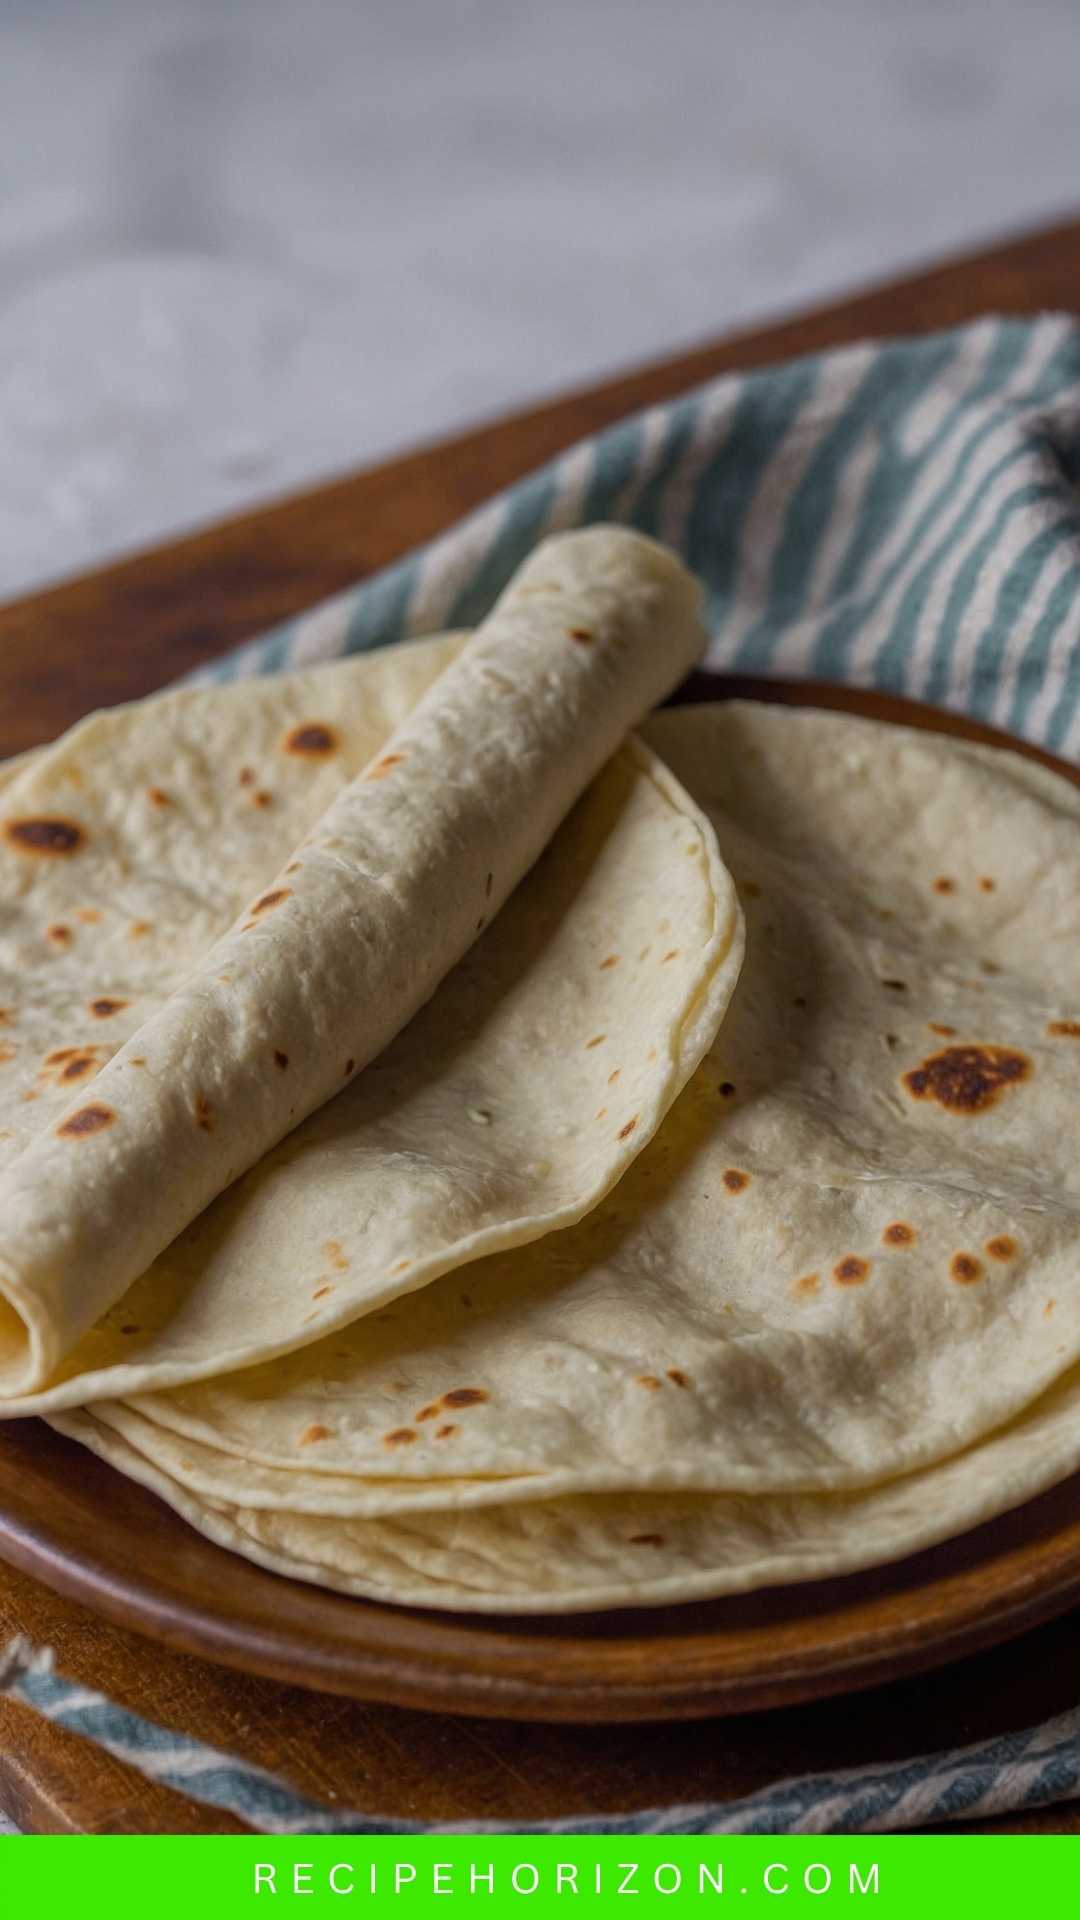
At its core, an authentic homemade flour tortillas recipe is a simple combination of flour, water, fat, and a bit of salt. The magic lies in the technique—kneading the dough just right, rolling, and cooking until they’re fluffy and slightly charred. Unlike store-bought tortillas, which often contain preservatives and stabilizers, homemade versions are free of unnecessary additives. They are pure, simple, and indulgent.
Why You’ll Love this Authentic Homemade Flour Tortillas Recipe
Making homemade flour tortillas at home offers multiple benefits that go beyond flavor. Let’s explore why you’ll appreciate this recipe.
- Freshness: The sensation of eating a freshly cooked tortilla is unbeatable. A warm tortilla straight off the skillet has this wonderful elasticity that store-bought tortillas just can’t match.
- Quality Ingredients: You control what goes into your tortillas. You’ll know exactly what you’re feeding your family, making it a healthier choice.
- Customization: Want them a tad thicker? Or how about a touch of cilantro or lime juice for zest? The beauty of making them at home is in the customization.
- Cultural Connection: Crafting these tortillas links you to a rich culinary history. Each roll, flip, and fold brings you a step closer to generations of tradition.
- Versatility: From burritos to quesadillas, tacos, or enchiladas—these tortillas carry endless possibilities. You can pair them with a wide variety of fillings, making them perfect for any occasion.
The Ingredients You Will Need To Make Authentic Homemade Flour Tortillas
Before we get cooking, gather these ingredients:
- 2 ½ cups all-purpose flour: This forms the base of your dough. It provides the structure and texture.
- 1 tablespoon fresh lime juice: This adds a subtle tang and enhances the overall flavor.
- ½ teaspoon baking powder: It helps achieve that fluffy texture that we all crave.
- 1 teaspoon fine sea salt: Essential for taste, it balances out the flavors.
- ⅓ cup vegetable shortening or lard: This will add richness and tenderness to your tortillas.
- 1 cup hot water: The warmth helps hydrate the flour effectively.
- 1 tablespoon finely chopped fresh cilantro : For those who enjoy a hint of herbal freshness.

Directions
Now, let’s roll up our sleeves and get into the nitty-gritty of making these delicious tortillas!
Step 1: Combine Dry Ingredients
Start by mixing together the flour, baking powder, and salt in a large mixing bowl. I like to whisk them together to ensure even distribution. This helps your tortillas have a consistent flavor and texture.
Step 2: Add Shortening or Lard
Next, add the vegetable shortening or lard to the flour mixture. Use your fingertips to rub the fat into the flour. You’re looking for a crumbly texture that resembles coarse breadcrumbs. This step is vital because it creates layers in your tortilla, giving it that satisfying chew.
Step 3: Incorporate Lime Juice and Water
Now, stir in the fresh lime juice. Slowly add the hot water, a little at a time, mixing with a wooden spoon until the dough starts to come together. If you find the dough too sticky, sprinkle a bit of flour until it’s manageable.
Step 4: Knead the Dough
Transfer the dough to a lightly floured surface. Knead it for about 3 to 5 minutes until it’s smooth and elastic. This step will develop the gluten, giving your tortillas that wonderful chewy texture. Wrap the dough in plastic wrap and let it rest for at least 30 minutes. This allows the gluten to relax and makes rolling easier.
Step 5: Divide the Dough
After resting, divide the dough into 8 to 12 equal portions, depending on how big you want your tortillas. Roll each portion into a ball and cover with a towel to keep them moist.
Step 6: Roll Out the Tortillas
Take one ball and flatten it slightly with your palm. Dust your work surface and rolling pin with flour. Roll out the dough into a circle, about 8 inches in diameter. Aim for uniform thickness for even cooking.
Step 7: Cook the Tortillas
Heat a skillet over medium-high heat. Once hot, place the rolled tortilla onto the skillet without oil. Cook for about 30 seconds on one side or until it starts to puff and brown slightly. Flip it, and cook for another 30 seconds. Repeat with the remaining tortillas, keeping finished ones warm in a clean kitchen towel.
Notes: Tips for Perfect Tortillas
- Use Hot Water: The hotter the water, the better the dough absorbs moisture, making for softer tortillas.
- Rest the Dough: Letting the dough rest is crucial. It makes rolling easier and gives the tortillas their distinctive texture.
- Don’t Overcook: Monitor your tortillas closely. They should have brown spots without being crispy.
- Storage is Key: Keep your cooked tortillas in an airtight container with a damp paper towel to retain moisture.
- Experiment with Fats: Consider trying different fats like butter or olive oil for varied flavors.
Storage Tips
To store your tortillas, place them in a sealed plastic bag or airtight container. They can last up to a week in the fridge. If you want to keep them longer, freeze them between sheets of parchment paper. Just pull out and reheat when you’re ready.
Nutrition Information
Each tortilla provides approximately:
Serving Suggestions
Now that you’ve made these babies, let’s think about how to serve them! Here are some top suggestions:
- Tacos: Fill warm tortillas with seasoned meat or beans, and top with cilantro and onion.
- Quesadillas: Stuff with cheese and your favorite veggies. Grill until golden and gooey.
- Enchiladas: Roll tortillas around a filling of choice and cover with enchilada sauce before baking.
- Breakfast Burritos: Scramble eggs, cheese, and any leftover veggies or meats; wrap tightly.
- Fajitas: Sauté bell peppers and onions, serve hot alongside grilled chicken or steak.

What Other Substitutes Can I Use in Authentic Homemade Flour Tortillas Recipe?
You might be curious about alternatives to specific ingredients. Here are some options:
- Cashew Butter: Use in place of shortening or lard for a nutty flavor that works very well.
- Whole Wheat Flour: For a stronger flavor and more fiber, substitute half or all the all-purpose flour.
- Olive Oil: A healthy alternative to lard or shortening that still retains a wonderful flavor.
- Almond Flour: Create gluten-free tortillas. Adjust moisture as needed since almond flour absorbs less.
- Cornstarch: Instead of baking powder, cornstarch can be used to reduce density.
Authentic Homemade Flour Tortillas Recipe
Ingredients
Equipment
Method
- Start by mixing together the flour, baking powder, and salt in a large mixing bowl. I like to whisk them together to ensure even distribution. This helps your tortillas have a consistent flavor and texture.
- Next, add the vegetable shortening or lard to the flour mixture. Use your fingertips to rub the fat into the flour. You’re looking for a crumbly texture that resembles coarse breadcrumbs. This step is vital because it creates layers in your tortilla, giving it that satisfying chew.
- Now, stir in the fresh lime juice. Slowly add the hot water, a little at a time, mixing with a wooden spoon until the dough starts to come together. If you find the dough too sticky, sprinkle a bit of flour until it’s manageable.
- Transfer the dough to a lightly floured surface. Knead it for about 3 to 5 minutes until it’s smooth and elastic. This step will develop the gluten, giving your tortillas that wonderful chewy texture. Wrap the dough in plastic wrap and let it rest for at least 30 minutes. This allows the gluten to relax and makes rolling easier.
- After resting, divide the dough into 8 to 12 equal portions, depending on how big you want your tortillas. Roll each portion into a ball and cover with a towel to keep them moist.
- Take one ball and flatten it slightly with your palm. Dust your work surface and rolling pin with flour. Roll out the dough into a circle, about 8 inches in diameter. Aim for uniform thickness for even cooking.
- Heat a skillet over medium-high heat. Once hot, place the rolled tortilla onto the skillet without oil. Cook for about 30 seconds on one side or until it starts to puff and brown slightly. Flip it, and cook for another 30 seconds. Repeat with the remaining tortillas, keeping finished ones warm in a clean kitchen towel.
Nutrition
Notes
- Use Hot Water: The hotter the water, the better the dough absorbs moisture, making for softer tortillas.
- Rest the Dough: Letting the dough rest is crucial. It makes rolling easier and gives the tortillas their distinctive texture.
- Don’t Overcook: Monitor your tortillas closely. They should have brown spots without being crispy.
- Storage is Key: Keep your cooked tortillas in an airtight container with a damp paper towel to retain moisture.
Tried this recipe?
Let us know how it was!Frequently Asked Questions
1. Can I make the dough ahead of time?
Absolutely! You can prepare the dough ahead of time and store it in the refrigerator for up to 48 hours. Just make sure to bring it back to room temperature before rolling it out.
2. Why are my tortillas not puffing?
If your tortillas are not puffing, it could be due to a couple of reasons: the dough may not be hydrated enough or the skillet may not be hot enough. Ensure the pan is preheated well, and try rolling the dough a little thicker for better puffing.
3. Can I use gluten-free flour?
Yes, you can use gluten-free flour to create a gluten-free version. However, the texture and flavor will differ slightly. Look for blends designed for baking.
4. How can I reheat the tortillas?
To reheat, place the tortillas in a hot skillet for about 15-20 seconds on each side. You can also wrap them in aluminum foil and warm them in the oven.
5. What can I do if my dough is too sticky?
If your dough is sticky, gradually add a little more flour until it reaches a manageable consistency. Don’t add too much at once, as it can make the tortillas tough.
6. How do I know if the tortillas are cooked properly?
Perfectly cooked tortillas should have light golden brown spots. They should be pliable and soft, not crispy or hard. If they puff up slightly while cooking, you’re on the right track!
Conclusion
Making your own Authentic Homemade Flour Tortillas is a rewarding experience that pays dividends in flavor and enjoyment.
Whether you’re wrapping them around seasoned meats or stuffing them with fresh vegetables, you’re in for a treat. This simple recipe unlocks a world where fresh ingredients shine, and culinary creativity reigns.