Ah, the smell of fresh bread. It wafts through the kitchen like a warm embrace, drawing in everyone nearby. Picture it: a crusty, golden loaf emerges from the oven, steam rising and the air filled with anticipation.
Let’s face it, who doesn’t love a warm slice of bread slathered in buttery goodness? But what pairs nicely with that bread?
Imagine dipping a crisp piece into a robust olive oil, garnished with a sprinkle of sea salt and perhaps a dash of balsamic vinegar. Or, how about piling it up with fresh tomatoes, basil, and mozzarella? A classic caprese sandwich screams summer.
And I can’t forget about a hearty soup—your easy homemade sourdough will shine next to a steaming bowl of minestrone or creamy tomato basil. You’ll have the table buzzing, believe me!

Let me tell you about my journey with sourdough. I stumbled into this delightful hobby one rainy afternoon. I had always been a bit intimidated by bread-making, but something clicked. The allure of sourdough was too strong to resist.
It felt almost like a rite of passage—a warm invitation into the world of fermentation and artistry. The end result? Sink-your-teeth-in goodness.
In this post, I’ll guide you through the ins and outs of crafting easy homemade sourdough bread. Trust me, it’s a culinary adventure worth taking. We’ll explore every element, from ingredients to storage, and I’m ready to spill a few personal tips along the way.
What is Easy Homemade Sourdough Bread?
No fancy terms here—easy homemade sourdough bread is simply about using a sourdough starter, a mix of basic ingredients, and a little patience. It’s magical how basic elements like flour, water, and time combine to create something incredibly satisfying.
That tangy flavor, those chewy textures, and that crispy crust? Pure joy!
But why is sourdough bread so special? Well, here’s the kicker: it’s alive. The sourdough starter you nurture is a living culture of wild yeast and bacteria. This dynamic duo not only helps the dough rise but also imparts complex flavors. It’s not “just bread,” it’s art we can eat.
Why This Recipe Works
When it comes to baking, some recipes are just floodgates of opportunity. Here’s why I believe this one stands above the rest:
1. Simplicity: The ingredients list is short and straightforward. Flour, water, starter, salt, and a touch of olive oil come together easily. No fuss, no frills. You won’t need to wrestle with any rare ingredients.
2. Flexibility: Whether you’re a complete novice or a baking aficionado, this recipe leaves room for creativity. Want to add herbs? Go for it! Toss in some seeds or nuts? Why not!
3. Flavor Development: With a longer fermentation process, you get that complex, flavorful profile that’s unique to sourdough. The overnight rise gives the yeast time to work its magic. It makes all the difference, trust me.
4. Health Benefits: Sourdough isn’t just good for your taste buds; it’s also easier on your digestive system compared to commercial bread. The fermentation process helps break down gluten, making some folks report fewer bloating discomforts. Plus, the presence of lactic acid bacteria can help improve gut health.
Ingredients You’ll Need To Make This Dish
Let’s break it down to the basics. Here’s what you need for your easy homemade sourdough bread:
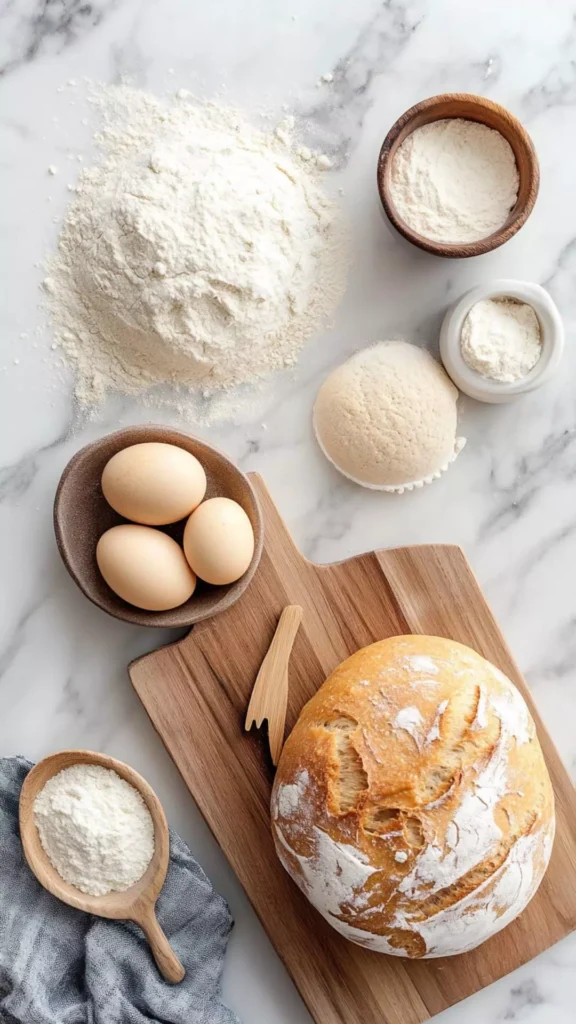
- 500g high-protein bread flour
- 250g lukewarm filtered water
- 150g bubbly, active sourdough starter
- 25g extra virgin olive oil
- 10g fine sea salt
- A pinch of sugar
- A small handful of fresh rosemary leaves
- Fine ground cornmeal or parchment paper, for dusting
How To Make This Easy Homemade Sourdough Bread?
To get you baking, I’ve laid out the process step-by-step. Grab your apron; let’s dive in!
Step 1: Feeding Your Starter
First, ensure your sourdough starter is active. Feed it six to eight hours before you begin. You want it bubbling like a fizzy drink at a summer picnic. If you’re unsure, a good test is to drop a spoonful of the starter into a glass of water. If it floats, you’re good to go!
Step 2: Mixing Ingredients
In a large mixing bowl, combine the flour, lukewarm water, your bubbly starter, and sugar. Mix these together just until there are no dry ingredients left. This is your moment—feel the texture as the ingredients combine. It’s like a creamy cloud beginning to form.
Step 3: Autolyse Phase
Let this mixture sit for about 30 minutes. This rest period allows the flour to absorb the water, creating a silky dough that feels just right. No kneading required yet!
Step 4: Add Salt and Oil
After your dough has relaxed, add the salt and olive oil. Grab a clean hand and pinch the salt into the mix. Fold the dough over itself several times to incorporate everything, and then give it a good squish. You’re creating an atmosphere of love here!
Step 5: Bulk Fermentation
Cover your bowl with a damp cloth and let it rest at room temperature for about 4–6 hours. Every 30 minutes during the first two hours, give the dough a gentle stretch and fold. This builds strength without overworking it.
Step 6: Shaping the Loaf
After the bulk fermentation, lightly flour your work surface. Gently turn the dough out and shape it into a round loaf. Don’t squish all the air out; we want that lovely rise. Just tuck the edges under to create tension.
Step 7: Proofing
Transfer your shaped dough to a well-floured proofing basket. Cover it and let it sit for another 2-3 hours at room temperature. This is the tense moment of waiting—it’ll be worth it!
Step 8: Preheat Your Oven
About 30 minutes before baking, preheat your oven to 450°F (230°C), placing a Dutch oven inside. That’s right, let it get nice and hot.
Step 9: Scoring the Bread
Once ready, carefully turn the dough onto a sheet of parchment paper. Here’s where you can get creative. Use a sharp knife or razor blade to score the top of the loaf. This allows the bread to expand—think of it as giving your bread a haircut!
Step 10: Baking
With the oven hot, lift the parchment paper with the dough and lower it into the Dutch oven. Cover it and bake for 30 minutes. Then remove the lid and bake for another 15-20 minutes until you’ve got that gorgeous golden brown crust.
Step 11: Cooling
Remove the bread from the oven and let it cool completely on a wire rack. This is the hardest step, but trust me, that first slice will be worth the wait!
Tips & Tricks
Here are some nuggets of wisdom that’ll elevate your sourdough game:
– Keep Your Starter Active: A well-fed starter is crucial. Feed it regularly, and choose the right time to bake when it’s bubbly and active.
– Use a Kitchen Scale: Baking is precise. Weighing your ingredients helps ensure consistency every time you bake.
– Experiment with Hydration: If you want a chewier texture, try increasing the water percentage—just keep an eye on the dough’s consistency.
– Be Patient: Good things take time. Resist the urge to rush through the fermentation stages; they enhance the flavor and texture.
– Practice Makes Perfect: If your first loaf isn’t perfect, don’t fret. Each bake teaches you something new. You’ll refine your technique over time.

How Do You Store The Leftovers?
If you manage to have any leftovers (which is rare in my house), here’s how to keep them:
– Room Temperature: Store in a paper bag or wrapped in a towel for 2-3 days. Avoid plastic as it can make it soggy.
– Freezing: If you want to keep it for longer, slice the bread and store it in a freezer-safe bag. It can last up to 3 months. Just pop a slice in the toaster when you crave it again!
What Sides Would Complement Easy Homemade Sourdough Bread?
Having your warm loaf is fantastic, but pairing it with sides makes the feast complete. Here are three stellar side choices:
1. Caprese Salad: Juicy tomatoes, creamy mozzarella, and fragrant basil drizzled with balsamic. This salad complements the sourdough beautifully, enhancing those rich flavors.
2. Roasted Garlic Soup: Creamy, comforting, and perfect for dipping. A slice of sourdough in a bowl of warm soup is pure bliss on a chilly evening.
3. Bruschetta: Fresh chopped tomatoes, garlic, and basil on toasted sourdough. It’s like a party on your plate, super easy to make, and deliciously fresh.
What Alternatives Can You Use for the Ingredients If They Are Not Present in Your Kitchen?
Running low on supplies? Here are some alternatives:
– Bread Flour: All-purpose flour can work. The texture may be slightly different, but it won’t ruin your bread.
– Active Sourdough Starter: You can use a commercial yeast. A packet of yeast can replace your starter, though you’ll lose that unique sour taste.
– Olive Oil: Other light oils like vegetable or grapeseed oil can step in if you find yourself out of olive oil.
– Fresh Rosemary: Dried herbs can substitute in, just use about a third of the amount, as they’re more concentrated.

Easy Homemade Sourdough Bread Recipe
Ingredients
Equipment
Method
- First, ensure your sourdough starter is active. Feed it six to eight hours before you begin. You want it bubbling like a fizzy drink at a summer picnic. If you’re unsure, a good test is to drop a spoonful of the starter into a glass of water. If it floats, you’re good to go!
- In a large mixing bowl, combine the flour, lukewarm water, your bubbly starter, and sugar. Mix these together just until there are no dry ingredients left. This is your moment—feel the texture as the ingredients combine. It’s like a creamy cloud beginning to form.
- Let this mixture sit for about 30 minutes. This rest period allows the flour to absorb the water, creating a silky dough that feels just right. No kneading required yet!
- After your dough has relaxed, add the salt and olive oil. Grab a clean hand and pinch the salt into the mix. Fold the dough over itself several times to incorporate everything, and then give it a good squish. You’re creating an atmosphere of love here!
- Cover your bowl with a damp cloth and let it rest at room temperature for about 4–6 hours. Every 30 minutes during the first two hours, give the dough a gentle stretch and fold. This builds strength without overworking it.
- After the bulk fermentation, lightly flour your work surface. Gently turn the dough out and shape it into a round loaf. Don’t squish all the air out; we want that lovely rise. Just tuck the edges under to create tension.
- Transfer your shaped dough to a well-floured proofing basket. Cover it and let it sit for another 2-3 hours at room temperature. This is the tense moment of waiting—it’ll be worth it!
- About 30 minutes before baking, preheat your oven to 450°F (230°C), placing a Dutch oven inside. That’s right, let it get nice and hot.
- Once ready, carefully turn the dough onto a sheet of parchment paper. Here’s where you can get creative. Use a sharp knife or razor blade to score the top of the loaf. This allows the bread to expand—think of it as giving your bread a haircut!
- With the oven hot, lift the parchment paper with the dough and lower it into the Dutch oven. Cover it and bake for 30 minutes. Then remove the lid and bake for another 15-20 minutes until you’ve got that gorgeous golden brown crust.
- Remove the bread from the oven and let it cool completely on a wire rack. This is the hardest step, but trust me, that first slice will be worth the wait!
Nutrition
Notes
- Keep Your Starter Active: A well-fed starter is crucial. Feed it regularly, and choose the right time to bake when it’s bubbly and active.
- Use a Kitchen Scale: Baking is precise. Weighing your ingredients helps ensure consistency every time you bake.
- Experiment with Hydration: If you want a chewier texture, try increasing the water percentage—just keep an eye on the dough’s consistency.
- Be Patient: Good things take time. Resist the urge to rush through the fermentation stages; they enhance the flavor and texture.
- Practice Makes Perfect: If your first loaf isn’t perfect, don’t fret. Each bake teaches you something new. You’ll refine your technique over time.
Tried this recipe?
Let us know how it was!Frequently Asked Questions
Conclusion
Making easy homemade sourdough bread is more than a cooking process; it’s a delightful journey. Sure, the ingredients are simple, but the experience and flavor that develops are anything but ordinary.
You get to witness a living culture transform into something spectacular, and that is a magical process.
Now that you’re armed with this knowledge, I encourage you to roll up those sleeves and give it a try. Bring along your favorite spread, gather loved ones around the table, and enjoy the fruits of your labor.
Whether it’s slathered in butter, dipped in soup, or crafted into sandwiches, your homemade sourdough will surely win hearts (and stomachs) wherever you share it. Happy baking!

