Linda Cain
Before diving into the delightful world of no-knead soft pretzel rolls, let’s talk about how to enjoy them. These rolls are versatile and can accompany a variety of dishes, making your meal more enjoyable. Here are some excellent pairings:
Honey Mustard Dipping Sauce: This easy-to-make sauce adds a sweet and tangy flavor that complements the saltiness of pretzel rolls perfectly. Mix 1 part honey with 1 part mustard for a delightful dip.
Cheese Fondue: What better way to enjoy soft pretzel rolls than dipping them in a creamy cheese fondue? Whether it’s Gruyère or cheddar, the gooey texture will elevate your snacking experience.
Homemade Tomato Soup: Picture this: a warm bowl of tomato soup paired with soft pretzel rolls. The comforting combination is perfect for chilly nights and casual gatherings alike.
Charcuterie Board: Elevate your next charcuterie board by adding these pretzel rolls. They go well with meats, cheeses, olives, and fruits, creating a beautiful spread for guests.

You’ll Also Like These Recipes
- 5 Ingredient Apple Cider Vinaigrette Recipe
- Roast Peppers On Stove Recipe
- Cheesecake Factory Brussel Sprouts
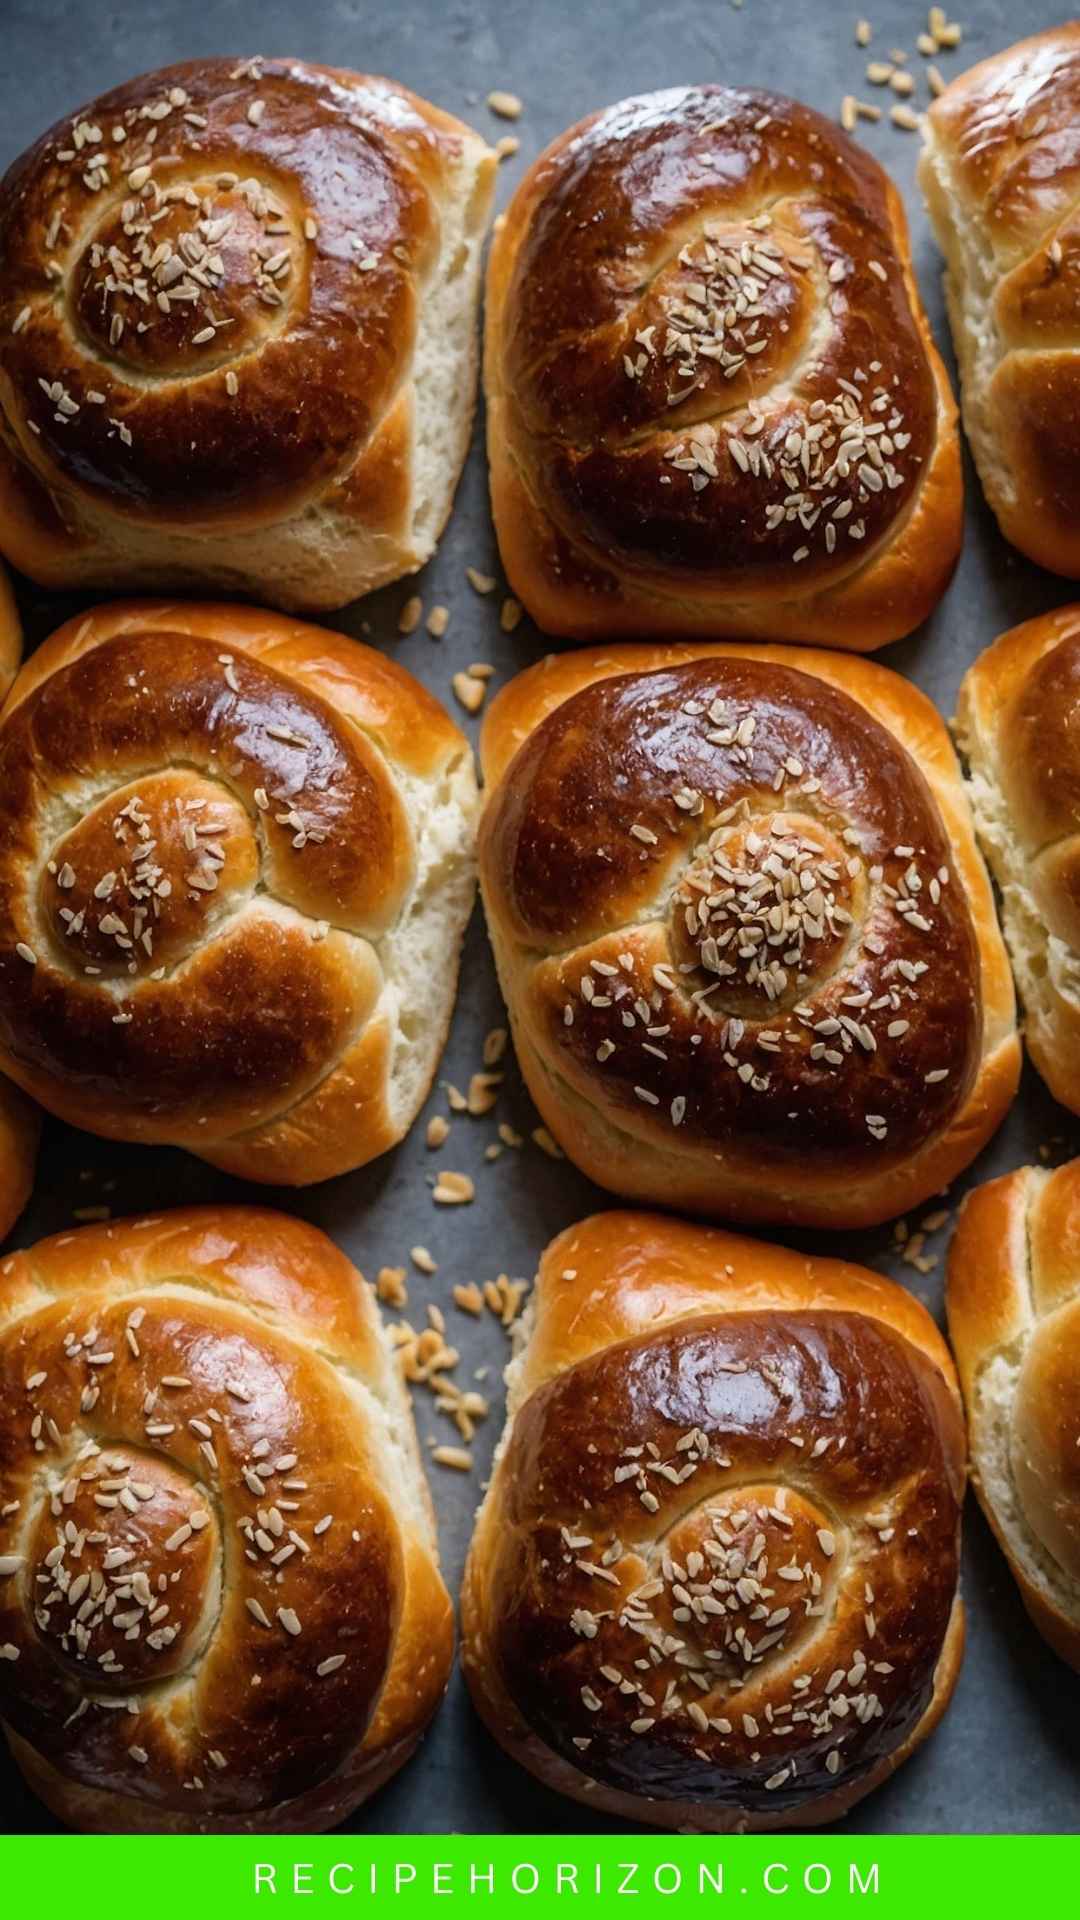
Let’s be real—who can resist the allure of soft pretzel rolls? These delicious bites have a crispy exterior with an incredibly soft interior, making them a delight to eat. I still remember the first time I had one, at a cozy little bakery with the smell of fresh bread wafting through the air. They were warm, slightly salty, and just perfect for savoring with friends. With a few simple ingredients and minimal effort, you can make these rolls at home. And believe me, once you try them, they will become a staple in your kitchen.
What Are No Knead Soft Pretzel Rolls?
No knead soft pretzel rolls are a simplified version of traditional pretzel dough. By using a no-knead method, the process is much easier and fuss-free, requiring only time for the dough to rise. This method results in the same chewy goodness that everyone loves, without the back-breaking work of kneading.
Why This Recipe Works
Simple Preparation
The beauty of these rolls lies in their simplicity. You don’t need fancy kitchen gadgets or a strong arm. With just a bowl and a spoon, you can mix your ingredients, cover the bowl, and let time do the work.
Flexible Ingredients
This recipe allows you to use basic pantry staples. Almost everyone has flour, yeast, and water on hand. You can even customize it further, depending on your taste preferences or what you have available.
Perfect Flavor and Texture
The process of boiling the rolls in baking soda water before baking gives them that signature pretzel flavor and golden brown color. It’s this step that transforms ordinary bread into something special—crunchy outside, soft within.
Versatile Serving Options
Enjoy them as a side at dinner, or serve them as a tasty snack. Use them for sliders at your next party, or pair them with soup on a brisk evening.
Ingredients You’ll Need to Make These No Knead Soft Pretzel Rolls
To whip up this delightful treat, gather the following ingredients:
1/2 teaspoon ground mustard powder
Adds a subtle tang.
1 and 1/2 cups warm water (around 100°F/38°C)
Pleasantly warm to help activate the yeast.
3 and 3/4 to 4 cups all-purpose flour
Spooned and leveled, plus more for dusting.
1 Tablespoon packed light brown sugar
Adds a touch of sweetness.
1/4 cup unsalted butter (divided)
Better texture and taste.
1/2 teaspoon garlic powder (optional)
Introduces a hint of savoriness.
2 and 1/4 teaspoons instant or active dry yeast
Essential for the perfect rise.
1 teaspoon fine sea salt
Enhances flavor.
Baking Soda Bath:
9 cups water
1/2 cup baking soda

How To Make These?
Ready to put your apron on? Let’s get started!
Step 1: Prepare the Dough
In a large bowl, combine the warm water, brown sugar, and yeast. Stir gently to combine and let it sit for about 5-10 minutes until it becomes foamy. This indicates the yeast is active.
Step 2: Mix the Dry Ingredients
Add the ground mustard powder, flour, and salt to the yeast mixture. Incorporate the flour gradually. Using a spoon or spatula, mix until no dry flour remains. The dough will be sticky; this is okay!
Step 3: Let the Dough Rise
Cover the bowl with a damp cloth or plastic wrap. Set it in a warm, draft-free place. Allow it to rise for at least 1 hour or until doubled in size.
Step 4: Shape the Rolls
Once the dough has risen, flour your work surface. Gently turn the dough out and divide it into 8-10 equal portions. Shape each piece into a roll, tucking the edges underneath for a round shape.
Step 5: Prepare the Baking Soda Bath
In a large pot, bring the water to a gentle boil. Gradually add the baking soda. Be careful, as it can bubble up! Once it’s dissolved, reduce it to a simmer.
Step 6: Boil the Rolls
Carefully drop a few rolls into the water bath. Boil each one for about 30 seconds, flipping halfway through. Remove with a slotted spoon and place them on a baking sheet lined with parchment paper.
Step 7: Brush and Salt
While the rolls are still wet, you can brush them with melted butter and sprinkle with coarse sea salt if desired.
Step 8: Bake
Preheat your oven to 425°F (220°C). Bake the rolls for 15-20 minutes or until they are golden brown.
Tips
Let the Dough Rest: If you have the time, allow the dough to sit longer during the first rise. The flavor will develop even further.
Check Your Yeast: If your yeast doesn’t bubble during the first step, it might be inactive. Be sure to use fresh yeast.
Use a Slotted Spoon: A slotted spoon is essential for transferring the rolls to avoid waterlogging.
Experiment with Toppings: Get creative! Add cheese, herbs, or spices to your dough for additional flavor.
Give Them Space to Rise: When you place them on the baking sheet, make sure there’s enough space in between. They will expand during baking.
Nutrition Information
Each no knead soft pretzel roll contains approximately:

(Nutritional values will vary based on specific measurements and ingredients used.)
How to Store the Leftovers?
Leftover pretzel rolls can be stored in an airtight container at room temperature for up to 3 days. If you’d like them to last longer, freeze them. Wrap each roll in plastic wrap and place them in a freezer bag. They can be stored for up to 3 months. To reheat, simply place them directly in a preheated oven at 350°F (175°C) for about 10-15 minutes.
Recommended Side Dishes for No Knead Soft Pretzel Rolls
If you’re looking to make a full meal, consider these side dishes:
Creamy Garlic Mashed Potatoes
The richness of these potatoes pairs beautifully with the rolls. The garlic complements the savory flavor, making each bite heavenly.
Grilled Vegetable Platter
Brighten your meal with a platter of grilled seasonal vegetables. The freshness and texture offer a nice contrast to the pretzel rolls.
Caesar Salad
A Caesar salad with crisp lettuce, parmesan, and a creamy dressing is a classic that brings balance to your plate.
Spicy Chili
Serve your rolls alongside a bowl of chili for dipping. It’s a match made in heaven, especially on a cool evening.

Substitute Options for Ingredients
Did you find yourself missing a key ingredient? Here are some substitutes:
All-Purpose Flour:
You can use bread flour for a chewier texture. Alternatively, you can combine whole wheat flour and all-purpose for a healthier twist.
Unsalted Butter:
If you’re out of butter, use olive oil. Coconut oil could also work well for a different flavor profile.
Honey:
While not typical for pretzels, agave syrup or maple syrup could be a sweet alternative.
Garlic Powder:
If you don’t have garlic powder, minced fresh garlic or garlic salt work as an alternative, just be cautious with the amounts.
No Knead Soft Pretzel Rolls Recipe
Ingredients
Equipment
Method
- In a large bowl, combine the warm water, brown sugar, and yeast. Stir gently to combine and let it sit for about 5-10 minutes until it becomes foamy. This indicates the yeast is active.
- Add the ground mustard powder, flour, and salt to the yeast mixture. Incorporate the flour gradually. Using a spoon or spatula, mix until no dry flour remains. The dough will be sticky; this is okay!
- Cover the bowl with a damp cloth or plastic wrap. Set it in a warm, draft-free place. Allow it to rise for at least 1 hour or until doubled in size.
- Once the dough has risen, flour your work surface. Gently turn the dough out and divide it into 8-10 equal portions. Shape each piece into a roll, tucking the edges underneath for a round shape.
- In a large pot, bring the water to a gentle boil. Gradually add the baking soda. Be careful, as it can bubble up! Once it’s dissolved, reduce it to a simmer.
- Carefully drop a few rolls into the water bath. Boil each one for about 30 seconds, flipping halfway through. Remove with a slotted spoon and place them on a baking sheet lined with parchment paper.
- While the rolls are still wet, you can brush them with melted butter and sprinkle with coarse sea salt if desired.
- Preheat your oven to 425°F (220°C). Bake the rolls for 15-20 minutes or until they are golden brown.
Nutrition
Notes
Tried this recipe?
Let us know how it was!Frequently Asked Questions
Can I make these rolls ahead of time?
Yes! You can prepare the dough and let it rise in the fridge overnight. Just bring it to room temperature before shaping and boiling.
What can I do with the dough if I don’t use it all?
You can shape leftovers into pretzel bites or freeze unused dough for a later date.
How do I know when my rolls are done?
They should be golden brown. Also, tapping the bottom should produce a hollow sound.
What’s the difference between instant yeast and active dry yeast?
Instant yeast can be mixed directly with dry ingredients, whereas active dry yeast usually needs to dissolve in water first. However, they can often be used interchangeably with slight adjustments.
Can these rolls be made gluten-free?
Absolutely! Use a gluten-free all-purpose flour blend. Ensure that any additional ingredients (such as baking powder) are also gluten-free.
Conclusion
Creating no knead soft pretzel rolls is an adventure in baking that rewards you with delightful flavors and textures. This recipe makes it easy for even novices to step into the kitchen and achieve great results. Whether served as a snack, side dish, or the star of the table, these pretzel rolls offer something for everyone. So roll up your sleeves, gather those simple ingredients, and let the magic happen! Enjoy the process, and savor every bite.
Now, go ahead and indulge—your taste buds will thank you!