Linda Cain
Before we jump into the nitty-gritty of making that perfect sourdough sandwich or toasting bread, let’s chat about what pairs beautifully with it. Think about creamy avocado, vibrant tomatoes, and crunchy lettuce.
Slather on some fresh pesto or aioli for that extra flair. And if you’re feeling indulgent, a slice of aged cheddar or provolone can elevate your sandwich to a whole new level. You can’t go wrong with classic spreads like butter or jam for those lovely toasts, either!

You’ll Also Like These Recipes
- Lofty Popovers Yorkshire Pudding Recipe
- Overnight Chia Oats Recipe Gluten Free Dairy Free Recipe
- Yummy Butternut Squash Lasagna
Have you ever waited impatiently for that golden loaf of sourdough to emerge from the oven? The kitchen filling with that warm, earthy scent? My love for sourdough bread runs deep; it’s a dance of flour and water, embraced by the magic of fermentation.
When I first attempted to make sourdough bread, I felt a rush of excitement mixed with the fear of messing it all up. But let me tell you; once I hit the sweet spot, it turned into a therapeutic ritual.
Today, I’m excited to share an easy sourdough sandwich and toasting bread recipe. This isn’t just any recipe; it’s a journey filled with twists, turns, and delightful discoveries. So, grab your apron, let’s get kneading!
What is an Easy Sourdough Sandwich or Toasting Bread Recipe?
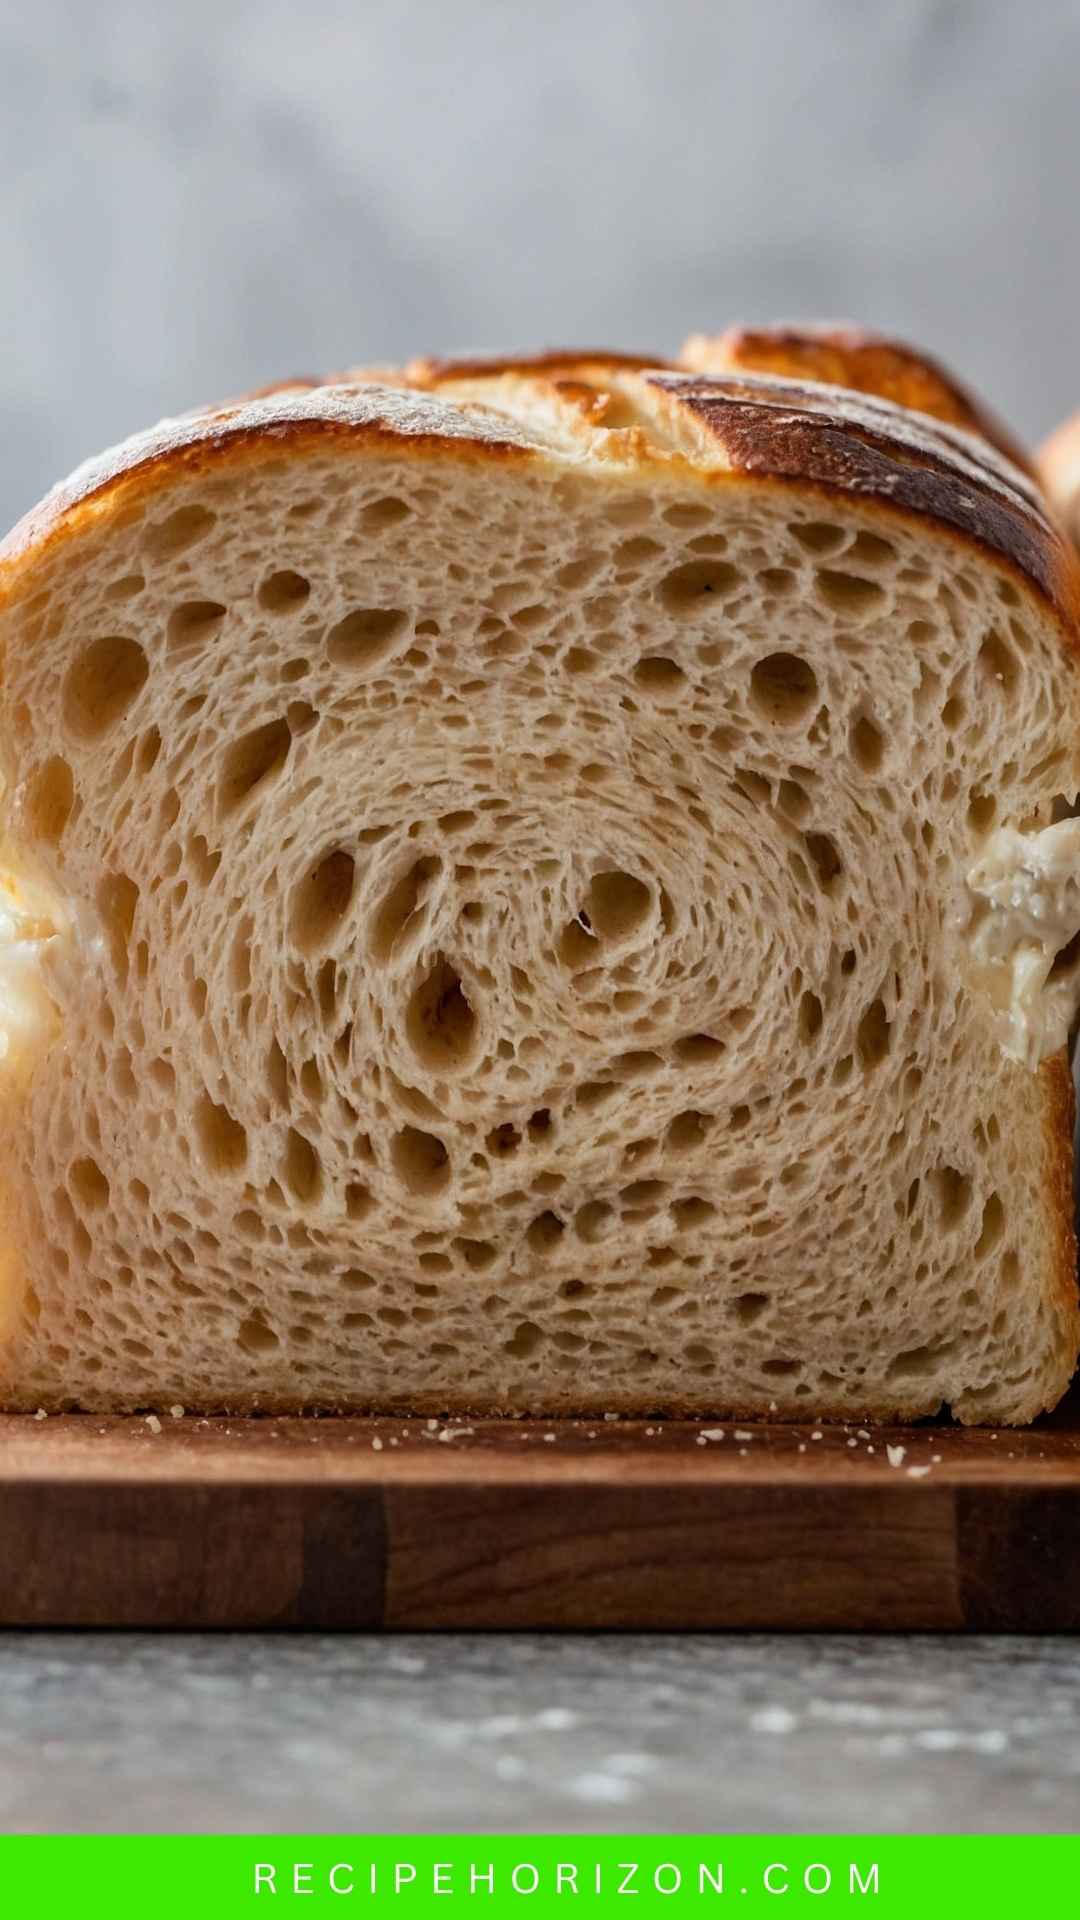
This easy sourdough recipe strikes the perfect balance for sandwiches or crispy toasts. With a crunchy crust and a soft, airy interior, it’s versatile yet straightforward. The beauty of sourdough lies in its depth of flavor, thanks to the fermentation process.
You’ll get a rustic loaf that will have family and friends clamoring for more. Trust me; once you’ve made this, you’ll never go back to store-bought bread.
Why This Recipe Works
Let’s break down why this recipe is a winner:
1. Simple Ingredients:
You don’t need a pantry full of exotic items. Just flour, water, salt, and your sourdough starter do the heavy lifting. These components create a delightful pairing of doughy goodness.
2. Easy Technique:
No need to be a seasoned baker. This recipe simplifies the sourdough process, making it accessible for everyone. Step-by-step guidance ensures you won’t feel lost along the way.
3. Versatile Usage:
Not just for sandwiches. This bread makes delightful toast, French toast, or even croutons. You can serve it alongside soups and salads. The possibilities are endless.
4. Sourdough Benefits:
Homemade sourdough is not just delicious; it’s healthier, too. It’s lower on the glycemic index, packed with beneficial probiotics, and easier to digest than commercial bread. Your gut will thank you!
Ingredients You’ll Need
- 430 grams (room temperature) water: Adjust as needed based on dough feel.
- 512 grams (about 4 cups) bread flour: Choose a high-protein flour, like King Arthur Flour, for best results.
- 100 grams (approximately 1/2 cup) active sourdough starter: This is your magic potion.
- 10 grams (around 2.5 teaspoons) kosher salt: This enhances flavor and gluten development.
- A few tablespoons of high-quality extra-virgin olive oil: To add richness.
- Softened room temperature butter: Used for greasing your pans.
- 1 teaspoon honey (optional): Helps yeast activity, adding subtle sweetness.
- 1 tablespoon toasted sesame seeds (optional): For a nutty crunch on top.

How to Make This Easy Sourdough Sandwich or Toasting Bread Recipe
Let’s roll up our sleeves and get started!
Step 1: Gather Your Tools
Begin by gathering all your ingredients and tools. You’ll need a mixing bowl, a wooden spoon, a kitchen scale (for accuracy), a dough scraper, and a loaf pan.
Step 2: Mix the Ingredients
In a large mixing bowl, combine the water and sourdough starter. Stir until incorporated. Now add the flour and salt. Use your hand or a wooden spoon to mix until no dry flour remains. It might seem a bit shaggy; that’s normal!
Step 3: Knead the Dough
Transfer the dough onto a clean, floured surface. Knead the dough for about 10 minutes. You’re looking for a smooth, elastic texture. If the dough is sticking too much, sprinkle a little flour as you go. Play with it; this is where the fun begins!
Step 4: Bulk Fermentation
Place your kneaded dough back in the bowl, cover it with a damp towel, and let it rise at room temperature for approximately 4 to 6 hours. This is the bulk fermentation phase. Keep an eye on it; give it a gentle poke—the dough should spring back slightly.
Step 5: Shape Your Loaf
Once your dough has risen, turn it out onto a floured surface again. Gently flatten it, shaping it into a rectangle. Fold the edges towards the center, then flip it over and tuck those edges in. Place the seam side down in your greased loaf pan.
Step 6: Final Proofing
Cover the loaf with a towel, letting it proof for an additional 2 to 3 hours. During this time, it should puff up nicely! This allows the flavors to develop further.
Step 7: Preheat the Oven
About 30 minutes before you plan to bake, preheat your oven to 450°F (230°C). Place a small oven-safe dish filled with water on the bottom rack to create steam. Steam is your friend; it keeps your crust crunchy!
Step 8: Bake the Bread
Once the oven is hot, score the top of your loaf with a sharp knife or a razor blade. This allows steam to escape and gives your bread a lovely shape. Bake for 25 to 30 minutes until the crust is golden and crispy. The internal temperature should reach about 200°F (93°C).
Step 9: Cool and Slice
After baking, let your loaf cool on a wire rack. This step is crucial—don’t slice it too soon, or you’ll lose that perfect texture. Once cooled, grab a serrated knife and cut yourself a slice. Dive in!
Tips & Tricks
- Use a Scale: Weighing ingredients ensures accuracy. A small change can affect your result.
- Starter Boost: Feed your sourdough starter the night before baking for maximum activity.
- Develop Flavor: For deeper flavor, let the dough rise slowly in the fridge overnight.
- Watch the Crust: If your crust is browning too quickly, cover it with foil during baking.
- Experiment with Add-ins: Try seeds, nuts, or herbs for a unique twist!
Nutrition Information
- Serving Size: 1 slice (approximately 100g)
- Calories: 260
- Total Fat: 4g
- Saturated Fat: 1g
- Cholesterol: 0mg
- Sodium: 250mg
- Total Carbohydrates: 52g
- Dietary Fiber: 3g
- Sugars: 1g
- Protein: 9g
How Do You Store the Leftovers?
Store any leftover sourdough in a paper bag at room temperature. Avoid plastic, as it traps moisture and can make the crust chewy. To extend its life, slice it and freeze pieces. Just pop them in a toaster when ready!
What Sides Would Complement Easy Sourdough Sandwich or Toasting Bread Recipe?
1. Fresh Salad:
Pair your sandwich with a crunchy salad. Think vibrant greens, cherry tomatoes, and a tangy vinaigrette. The freshness elevates the meal.
2. Creamy Soup:
A warm bowl of tomato basil or butternut squash soup will complement the bread beautifully. Dip that crispy crust, and let the flavors dance in your mouth.
3. Pickles and Olives:
Offer a side of tangy pickles or savory olives. They add a delightful crunch and sharpness, balancing the bread’s flavor.

What Alternatives Can You Use for the Ingredients If They Are Not Present in Your Kitchen?
1. Flour Substitutes:
If you don’t have bread flour, all-purpose flour works. The texture might be slightly different, but it’s still delicious.
2. Other Liquids:
For the liquid, you can replace water with milk for a richer bread. Almond or soy milk is also viable for a dairy-free option.
3. Different Oils:
In place of olive oil, any neutral oil like canola or grapeseed can be used. They’ll alter the flavor slightly but still yield a lovely loaf.
4. Alternative Sweeteners:
If honey isn’t available, maple syrup or agave nectar works just as well.
Easy Sourdough Sandwich
Ingredients
Equipment
Method
- Begin by gathering all your ingredients and tools. You’ll need a mixing bowl, a wooden spoon, a kitchen scale (for accuracy), a dough scraper, and a loaf pan.
- In a large mixing bowl, combine the water and sourdough starter. Stir until incorporated. Now add the flour and salt. Use your hand or a wooden spoon to mix until no dry flour remains. It might seem a bit shaggy; that’s normal!
- Transfer the dough onto a clean, floured surface. Knead the dough for about 10 minutes. You’re looking for a smooth, elastic texture. If the dough is sticking too much, sprinkle a little flour as you go. Play with it; this is where the fun begins!
- Place your kneaded dough back in the bowl, cover it with a damp towel, and let it rise at room temperature for approximately 4 to 6 hours. This is the bulk fermentation phase. Keep an eye on it; give it a gentle poke—the dough should spring back slightly.
- Once your dough has risen, turn it out onto a floured surface again. Gently flatten it, shaping it into a rectangle. Fold the edges towards the center, then flip it over and tuck those edges in. Place the seam side down in your greased loaf pan.
- Cover the loaf with a towel, letting it proof for an additional 2 to 3 hours. During this time, it should puff up nicely! This allows the flavors to develop further.
- About 30 minutes before you plan to bake, preheat your oven to 450°F (230°C). Place a small oven-safe dish filled with water on the bottom rack to create steam. Steam is your friend; it keeps your crust crunchy!
- Once the oven is hot, score the top of your loaf with a sharp knife or a razor blade. This allows steam to escape and gives your bread a lovely shape. Bake for 25 to 30 minutes until the crust is golden and crispy. The internal temperature should reach about 200°F (93°C).
- After baking, let your loaf cool on a wire rack. This step is crucial—don’t slice it too soon, or you’ll lose that perfect texture. Once cooled, grab a serrated knife and cut yourself a slice. Dive in!
Nutrition
Notes
- Use a Scale: Weighing ingredients ensures accuracy. A small change can affect your result.
- Starter Boost: Feed your sourdough starter the night before baking for maximum activity.
- Develop Flavor: For deeper flavor, let the dough rise slowly in the fridge overnight.
- Watch the Crust: If your crust is browning too quickly, cover it with foil during baking.
- Experiment with Add-ins: Try seeds, nuts, or herbs for a unique twist!
Tried this recipe?
Let us know how it was!Frequently Asked Questions
1. What if my sourdough starter isn’t bubbling?
If your starter isn’t activating, try feeding it with equal parts flour and water. Allow it to sit in a warm area. It may take a few feeds to perk up.
2. Can I bake bread without a Dutch oven?
Absolutely! An alternative is placing a baking stone in the oven and sliding the bread directly onto it. Use a pan for steam.
3. Is it necessary to score the bread?
Scoring helps control where the bread expands. If you skip it, your loaf might burst unpredictably.
4. How can I tell when my bread is done?
Knock on the bottom of the loaf; if it sounds hollow, it’s done. An instant-read thermometer should read about 200°F (93°C).
5. Can I use whole wheat flour?
Yes! Whole wheat flour is an excellent choice but blend it with bread flour for a lighter texture.
6. Can I make this recipe gluten-free?
Using gluten-free flour blends specifically created for bread can yield a satisfactory loaf. Check the package instructions for best practices and hydration levels.
Conclusion
There you have it! A simple yet fulfilling recipe to create your own sourdough sandwich or toasting bread. As you craft this loaf, remember that each step brings you closer to enjoying the fruits of your labor.
Baking is a journey filled with patience and love, resulting in a warm, delightful treat. Enjoy your bread with loved ones, and relish every moment! Give this recipe a try, and please share your experiences. Happy baking!