Linda Cain
Before we dive deep into the delightful world of Mrs. Myers Banana Bread, let’s talk about what to enjoy alongside it. Pair this moist, flavorful loaf with a cup of steaming coffee to enrich those banana flavors. Or, for a cozy afternoon, try it with a dollop of homemade whipped cream and fresh berries. When brunching, serve it with a light yogurt parfait. The creamy yogurt and fresh fruit cut through the bread’s sweetness beautifully.

You’ll Also Like These Recipes
- Baked Steel Cut Oatmeal Recipe
- Lofty Popovers Yorkshire Pudding Recipe
- How to Make Lemon Blueberry Dutch Baby
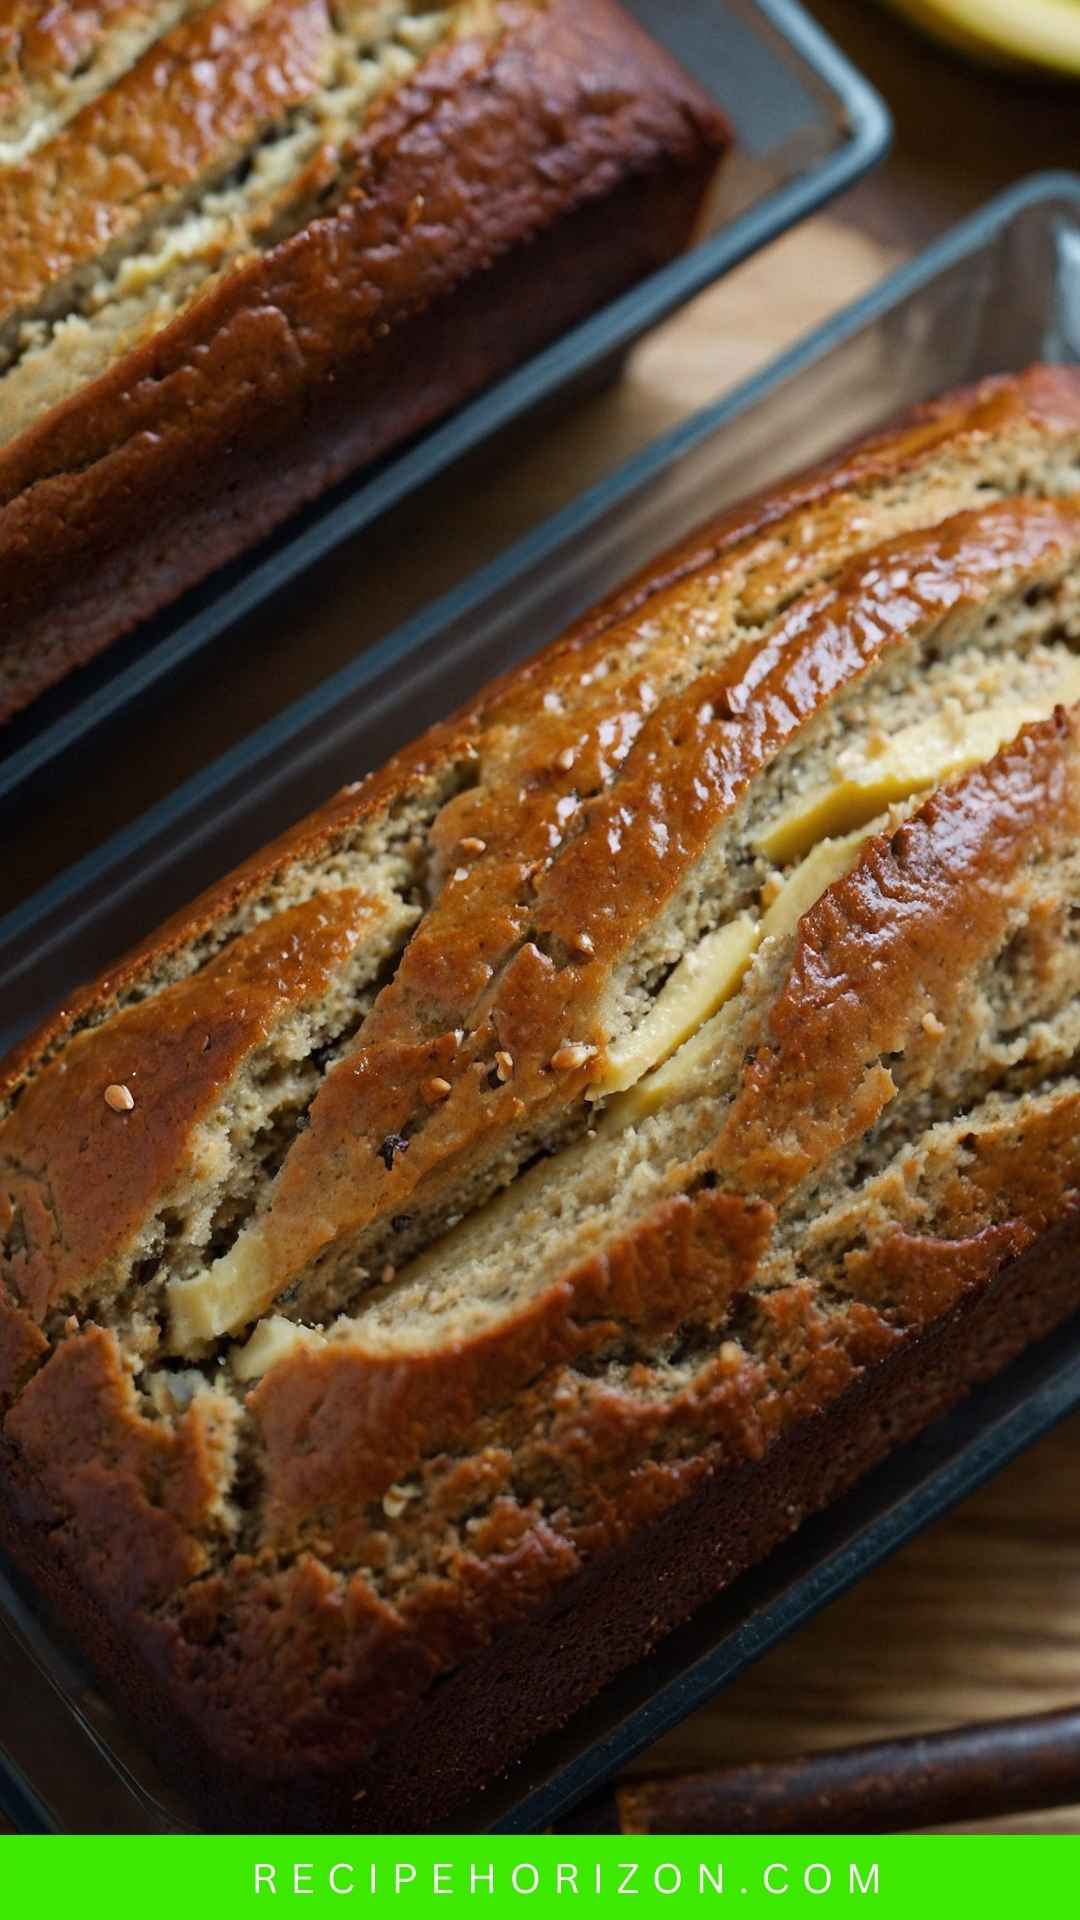
There’s something magical about banana bread. Maybe it’s the aroma wafting through the kitchen as it bakes. Or perhaps it’s the cozy comfort of a slice slathered with butter, enjoyed with a warm drink. Today, I’m sharing my take on Mrs. Myers Banana Bread, a recipe that has stood the test of time. Living through many generations, this bread represents comfort, warmth, and delightful flavors. It’s easy to make and even easier to eat. Let’s embark on this mouthwatering journey together.
What is Mrs. Myers Banana Bread?
Mrs. Myers Banana Bread is a classic recipe passed down through families, often rekindling fond memories of home. It’s rich, sweet, and packed with the bold flavor of ripe bananas. Its texture is soft, yet it holds together nicely, making it perfect for slicing. This recipe truly showcases how a few simple ingredients can create something extraordinary. Whether you’re making it for a cozy breakfast or as a treat for guests, it’s bound to impress.
Why This Recipe Works
Now, let’s explore why this recipe is a keeper. It’s not just about throwing ingredients into a bowl; it’s about the magic that happens when they come together.
- Perfect Banana Balance
Using ripe bananas is non-negotiable. They provide natural sweetness and moisture, creating a tender crumb. Eventually, the ripening process enhances that banana flavor, making every bite a reason to smile. - Simple Ingredients
The recipe calls for pantry staples, which makes it approachable. You probably have most ingredients at home right now. No need for specialized items; simplicity is key here. - Versatility is Key
This recipe can easily be customized. Add walnuts for a crunch, or swirl in peanut butter for a decadent twist. The possibilities are endless and allow you to make it your own. - Easy to Follow
With straightforward steps, even novice bakers can create a bakery-style banana bread. It doesn’t require fancy equipment or intricate techniques. Just mix, pour, and bake.
Ingredients You’ll Need To Make Mrs. Myers Banana Bread
Here’s a complete list of what you need:
- 1 quart mashed ripe bananas (about 6–8 bananas)
- 2 cups granulated sugar
- 1 cup unsalted butter, softened
- 4 to 5 large eggs
- ½ cup buttermilk
- 3 cups all-purpose flour (sifting optional)
- 1 teaspoon baking soda
- 1 teaspoon table salt (or 1.5 teaspoons kosher salt)
- 2 teaspoons pure vanilla extract
- 1 cup chopped nuts (optional)
- ½ teaspoon ground cinnamon (optional)
- ¼ teaspoon freshly grated nutmeg (optional)

How To Make Mrs. Myers Banana Bread?
Let’s get baking! Here are the detailed steps to create this scrumptious bread:
Step 1: Prep Your Bananas
Start by peeling your ripe bananas. The browner, the better! Mash them in a bowl using a fork or potato masher until you have a smooth consistency. Set aside.
Step 2: Cream the Butter and Sugar
In a large mixing bowl, cream together the softened butter and granulated sugar until the mixture is light and fluffy. This step is crucial as it introduces air bubbles, making your bread fluffy.
Step 3: Add the Eggs
Crack the eggs into the bowl one at a time, making sure to mix well after each addition. Incorporating them properly will help create a unified batter.
Step 4: Mix in the Bananas and Buttermilk
Now it’s time to add the mashed bananas and buttermilk. Mix these ingredients into the batter until well combined. Don’t worry if there are a few lumps; that’s part of the charm.
Step 5: Combine Dry Ingredients
In a separate bowl, whisk together the flour, baking soda, salt, and any optional spices like cinnamon and nutmeg. This ensures the leavening agents are evenly distributed.
Step 6: Combine Wet and Dry Ingredients
Gradually add the dry ingredients to the wet mixture, stirring gently. Be careful not to overmix; this will help keep your banana bread tender. If you’re using nuts, fold them in at this point.
Step 7: Bake
Preheat your oven to 350°F (175°C). Pour your batter into a greased loaf pan. Bake for about 60-70 minutes, or until a toothpick inserted in the center comes out clean.
Step 8: Cool and Enjoy
Once baked, remove from the oven and let it cool in the pan for about 10 minutes. Then, transfer it to a wire rack to cool completely. Then slice, serve, and enjoy the deliciousness you’ve created!
Tips for Making the Best Banana Bread
Here are a few tips to elevate your banana bread game:
- Use Overripe Bananas: The riper the bananas, the sweeter your bread will be. Don’t be afraid to let them brown on the counter.
- Measure Flour Correctly: Using the spoon-and-level method prevents packing the flour, which can lead to dense bread.
- Room Temperature Ingredients: Make sure your eggs and butter are at room temperature for better mixing.
- Don’t Overmix: Gently combine the ingredients to avoid tough texture.
- Check for Doneness: Ovens vary in temperature. Start checking your bread after 50 minutes to ensure perfect baking.
Nutrition Information
For those watching their intake, here’s a quick breakdown:
- Serving Size: 1 slice (1/10 of the loaf)
- Calories: Approx. 320
- Total Fat: 14g
- Saturated Fat: 8g
- Cholesterol: 70mg
- Sodium: 200mg
- Total Carbohydrates: 50g
- Dietary Fiber: 2g
- Sugars: 25g
- Protein: 4g
How to Store The Leftovers?
To keep your banana bread fresh, wrap it tightly in plastic wrap or foil. You can store it at room temperature for up to 3 days, or in the refrigerator for up to a week. If you want to keep it longer, slice it and freeze it in an airtight container. It will maintain freshness for about 2-3 months. Thaw slices as needed for a quick snack!
Recommended Side Dishes for Mrs. Myers Banana Bread
Pairing is essential to a complete meal. Here are a few side dish suggestions that go well with banana bread:
- Greek Yogurt with Honey: Creamy and slightly tangy, it complements the sweetness of the bread perfectly. Add a sprinkle of nuts or granola for crunch.
- Fresh Berries: Strawberries, blueberries, or raspberries add a burst of color and acidity that balances the bread’s sweetness.
- Nut Butters: Spread almond or peanut butter over your banana bread slice. The nuttiness enhances the flavor profile and adds protein.
- Coffee or Tea: A warm beverage complements the texture and taste of the bread, making for a cozy snack.

Substitute Options for Ingredients
If you find yourself missing an ingredient, don’t fret. Here are some substitutes:
- Buttermilk: Use plain yogurt or a mixture of milk and vinegar (1 cup of milk + 1 tablespoon of vinegar) as a replacement.
- Granulated Sugar: Brown sugar can be used for a deeper, molasses-like flavor.
- Unsalted Butter: Coconut oil or vegetable oil works well in place of butter, though it may alter the flavor slightly.
- Eggs: For an egg-free version, use ground flaxseeds (1 tablespoon flaxseed meal + 2.5 tablespoons of water = 1 egg).
Mrs. Myers Banana Bread
Ingredients
Equipment
Method
- Start by peeling your ripe bananas. The browner, the better! Mash them in a bowl using a fork or potato masher until you have a smooth consistency. Set aside.
- In a large mixing bowl, cream together the softened butter and granulated sugar until the mixture is light and fluffy. This step is crucial as it introduces air bubbles, making your bread fluffy.
- Crack the eggs into the bowl one at a time, making sure to mix well after each addition. Incorporating them properly will help create a unified batter.
- Now it’s time to add the mashed bananas and buttermilk. Mix these ingredients into the batter until well combined. Don’t worry if there are a few lumps; that’s part of the charm.
- In a separate bowl, whisk together the flour, baking soda, salt, and any optional spices like cinnamon and nutmeg. This ensures the leavening agents are evenly distributed.
- Gradually add the dry ingredients to the wet mixture, stirring gently. Be careful not to overmix; this will help keep your banana bread tender. If you’re using nuts, fold them in at this point.
- Preheat your oven to 350°F (175°C). Pour your batter into a greased loaf pan. Bake for about 60-70 minutes, or until a toothpick inserted in the center comes out clean.
- Once baked, remove from the oven and let it cool in the pan for about 10 minutes. Then, transfer it to a wire rack to cool completely. Then slice, serve, and enjoy the deliciousness you’ve created!
Nutrition
Notes
- Use Overripe Bananas: The riper the bananas, the sweeter your bread will be. Don’t be afraid to let them brown on the counter.
- Measure Flour Correctly: Using the spoon-and-level method prevents packing the flour, which can lead to dense bread.
- Room Temperature Ingredients: Make sure your eggs and butter are at room temperature for better mixing.
- Don’t Overmix: Gently combine the ingredients to avoid tough texture.
- Check for Doneness: Ovens vary in temperature. Start checking your bread after 50 minutes to ensure perfect baking.
Tried this recipe?
Let us know how it was!Frequently Asked Questions
Can this recipe be doubled?
Absolutely! Just double all the ingredients and use larger pans if needed. Baking time may vary, so keep an eye on it.
Is it possible to make banana bread gluten-free?
Yes! Substitute all-purpose flour with a gluten-free flour blend. Ensure it includes xanthan gum for the best texture.
What are the signs that the banana bread is done?
When it’s golden brown on top, pulls away from the edges of the pan, and a toothpick comes out clean, your bread is ready.
Can I add chocolate chips?
Definitely! Chocolate chips elevate the flavors and provide a delightful sweetness.
How do I know if my bananas are ripe enough?
Look for brown spots with a yellow base. They should be soft to the touch but not mushy. The browner, the better!
Conclusion
Baking Mrs. Myers Banana Bread is more than just a recipe; it’s about creating memories in the kitchen. The sweetness, warmth, and inviting aroma wrap around you like a favorite blanket. Whether enjoyed fresh out of the oven or a day or two later, it’s a timeless treat that brings a smile with each bite. So, gather those ripe bananas and start baking. You’re about to make more than just banana bread; you’re creating little slices of happiness that everyone will love.